
The DvZ Concept Pistol
Introduction
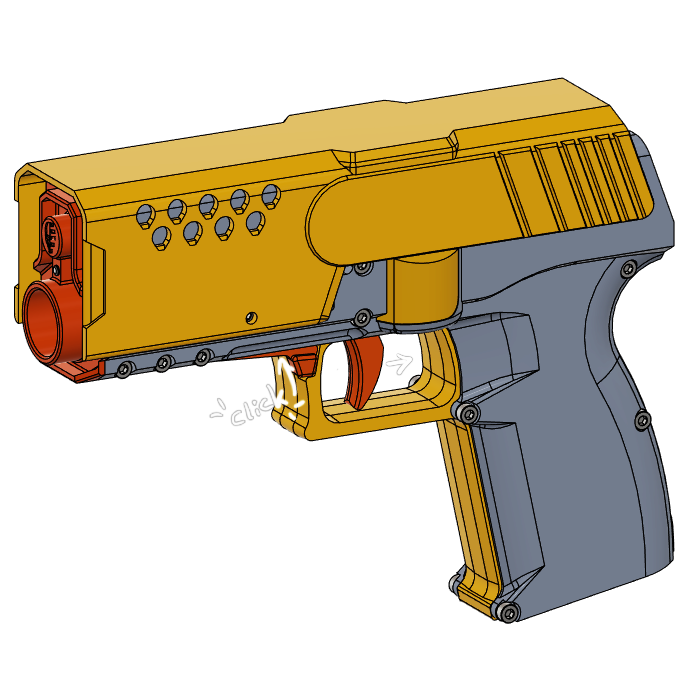
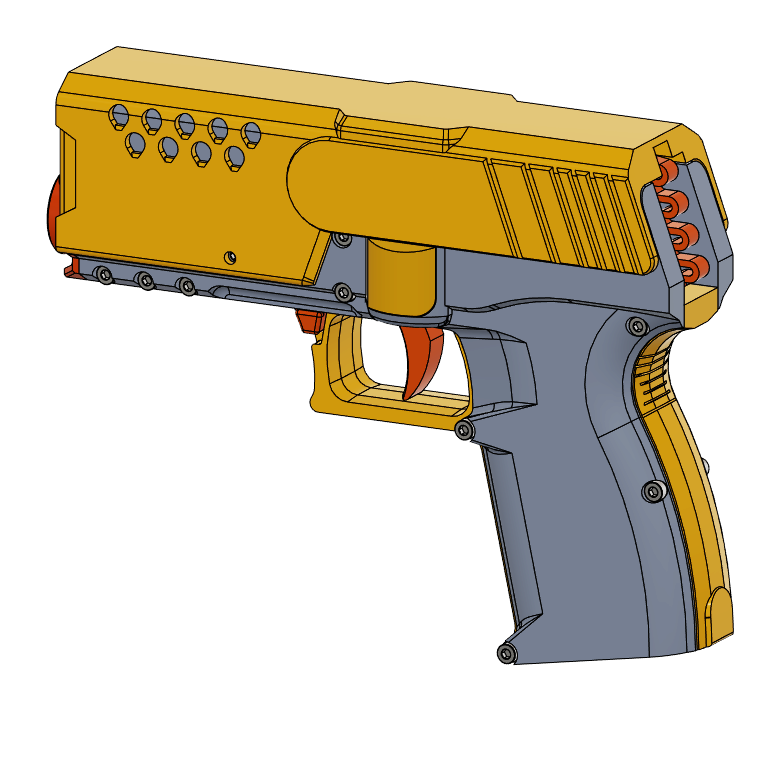
About the Concept Pistol
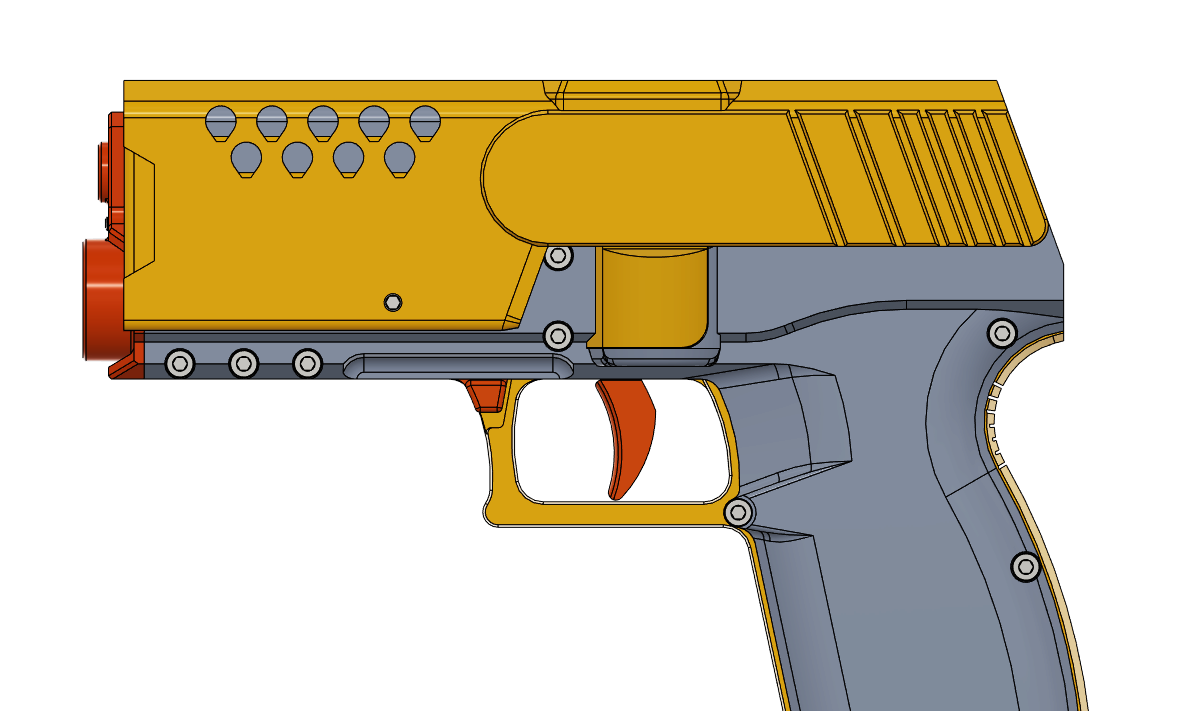
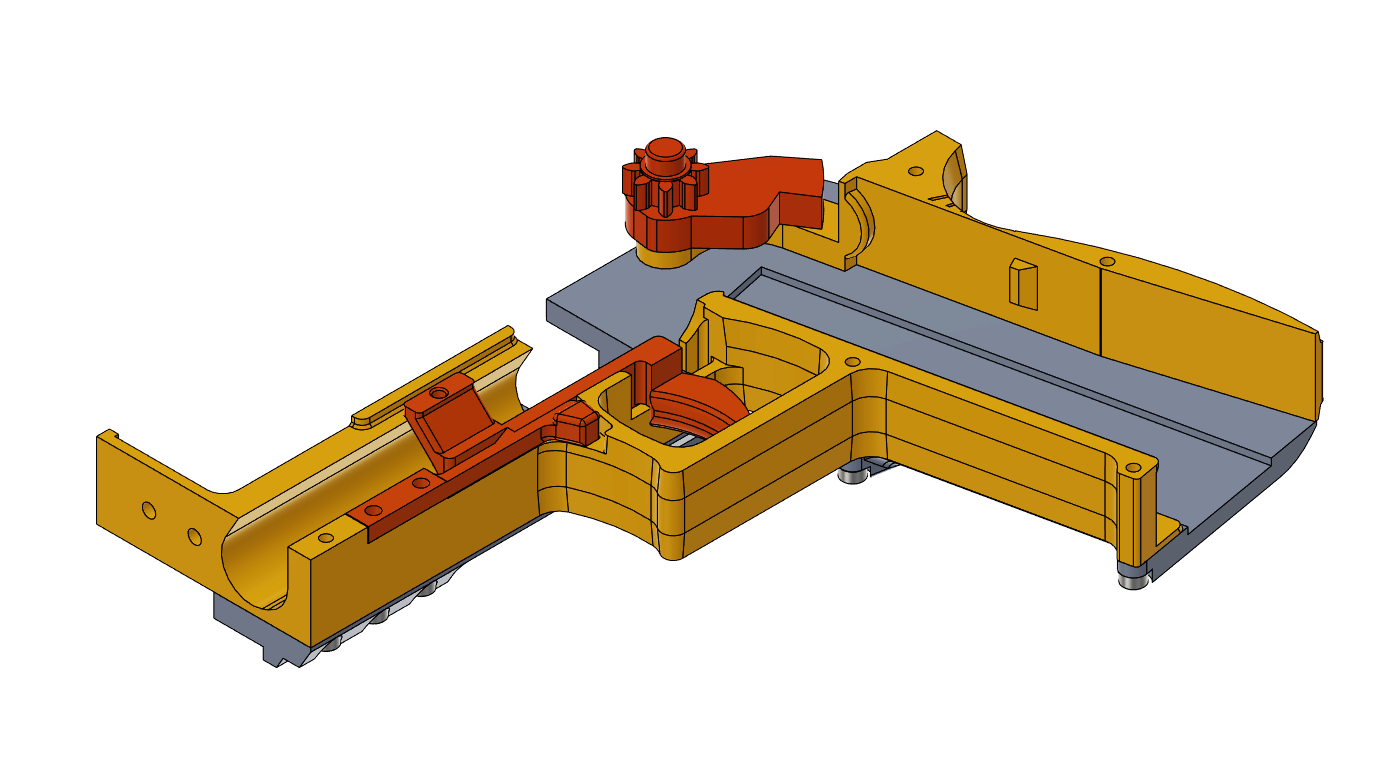
The DvZ Concept Pistol is a sidearm sized semi-automatic micro-flywheel Foam Dart Blaster. It takes Worker Talons and compatible magazines and is fired from a single trigger setup.
The Blaster has been designed with simplicity and ease of assembly in mind.
Microwheel Blasters
Microwheels were coined by Flywheel the World (FTW) from Australia, but there are compatible wheels from other makers as well. There are many 3D printable blasters that make good use of the small form factor of the wheels and his particular blaster can achieve muzzle velocities of up to 150fps.
Ease of assembly
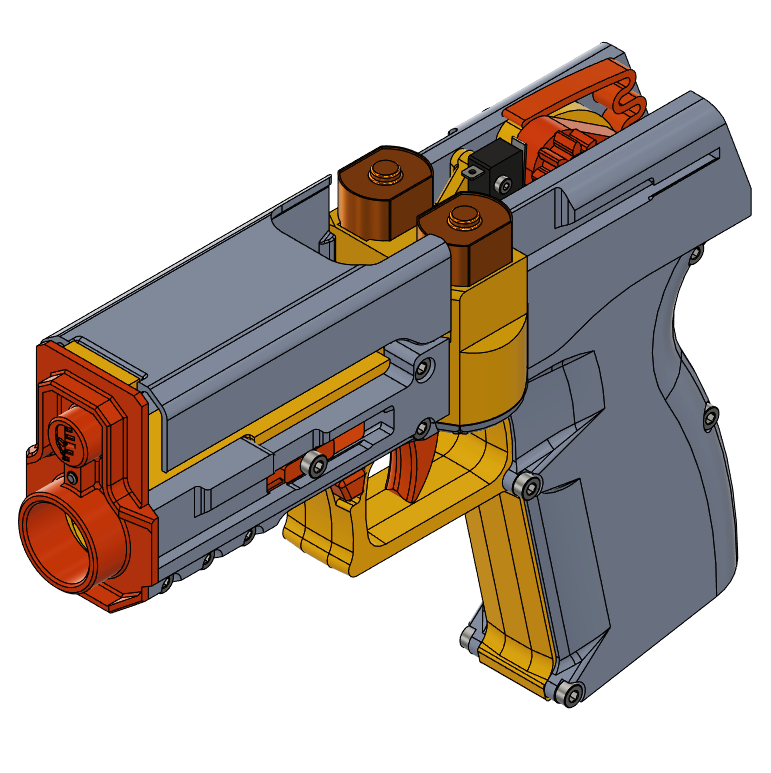
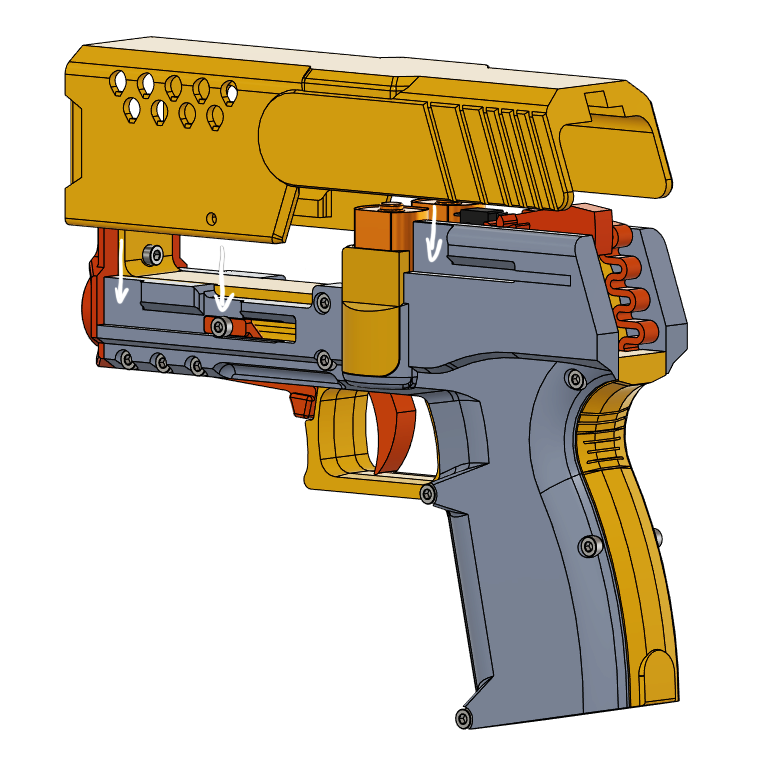
By splitting the body of the Concept Pistol into 4 main pieces, the design makes good use of naturally flat surfaces and enables all parts to be printed without supports. The Blaster can be built with the most basic hardware and in a ditch even with only leftover screws.
The mechanism has been stripped down to its bare bones and works with 5 moving parts for both firing, magazine release and battery access. To achieve that, the slide doubles as trigger linkage and is returned by a printed spring and the disassembly and mag-release lever are also making use of flexible designs.
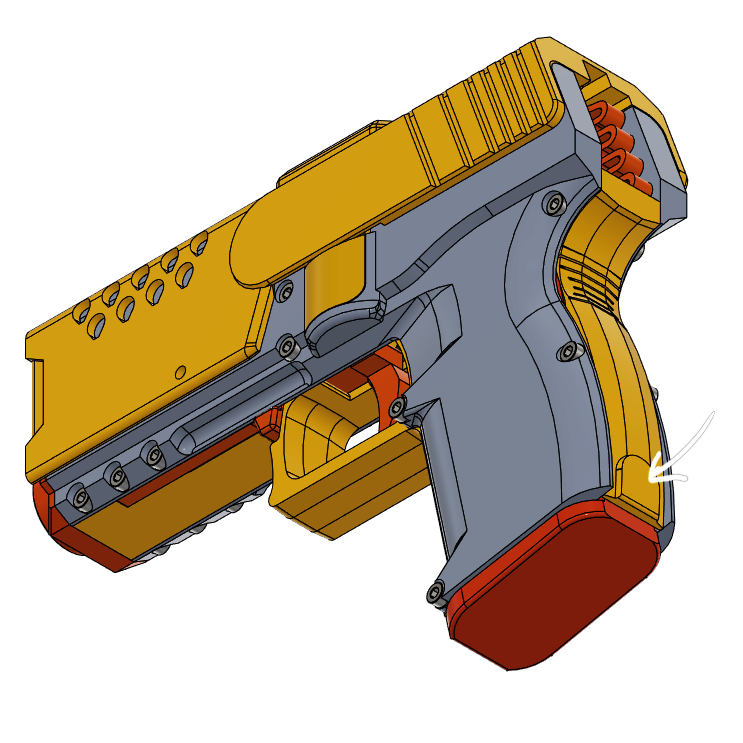
All electronics mount to the flywheel cage component which means they can be assembled outside of the blaster, removed for maintenance and also swapped out between games or events.
Components
Hardware
| Amount | Size | Head | Thread |
|---|---|---|---|
| 19 | M3x10 | Pan or Cylinder Head | Coarse |
| 1 | M3x6 | Cylinder Head | Coarse |
| 2 | M2x10 | Pan or Cylinder Head | Coarse |
| 4 | M2x4 | Flat Head | Metric |
Metric threaded screws can be used instead of coarse threads, but for those preparing the prints with a thread-cutter is recommended. For aesthetic reasons I prefer socket head screws, but pan heads will work just as well.
Electronics
The electronics setup for this blaster is remarkably simple.
- 1x 5A, Omron-style micro-switch
- 2x hobby-grade 130 motors
- 1x pair FTW-spec Microwheels
Microwheel Flywheel Blasters require higher motor speeds than usual. The go-to motors for these builds like the MTB Honeybadger and FTW Merlin Motors run at about 74kRPM. Lower RPM are possible, but at least 50kRPM are recommended.
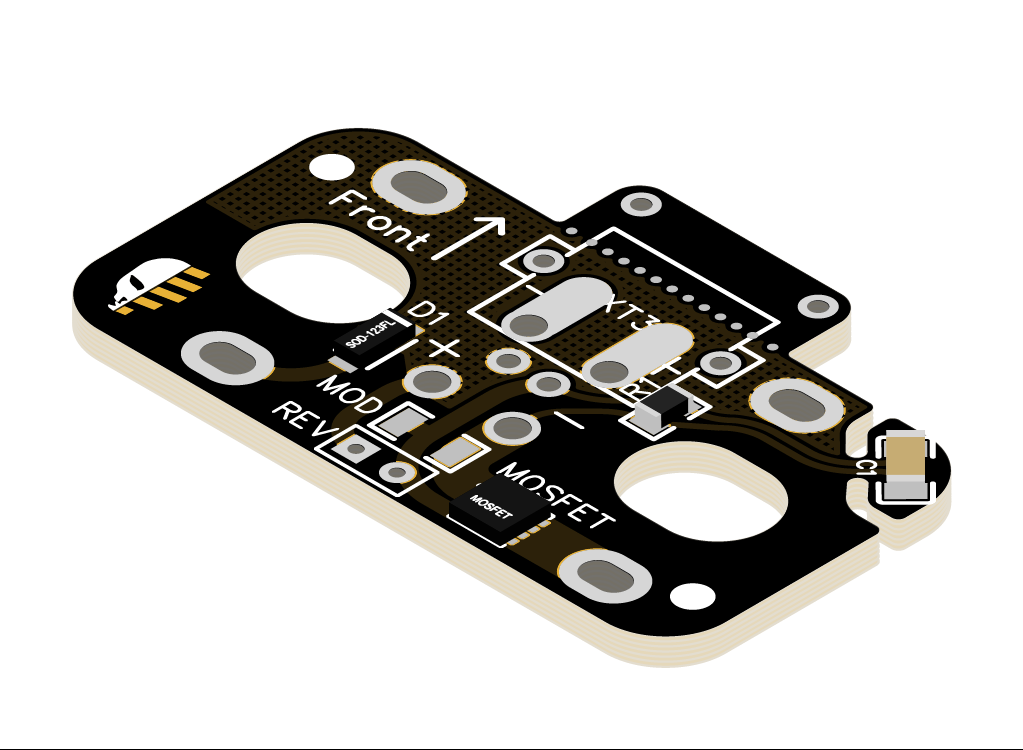
For high powered motors, a MosFET is highly recommended and the DvZ MicroFET PCB was specifically designed for this job.
Batteries
The Concept pistol offers a lot of Battery space with a bounding box of 35x83x29mm (38x85x30mm if the protective cover is omitted).
Known working Batteries are the Turnigy Graphene (Panther) 950mAh 2s and the Turnigy Bolt 850mAh 3s (which will only fit without the battery cage).
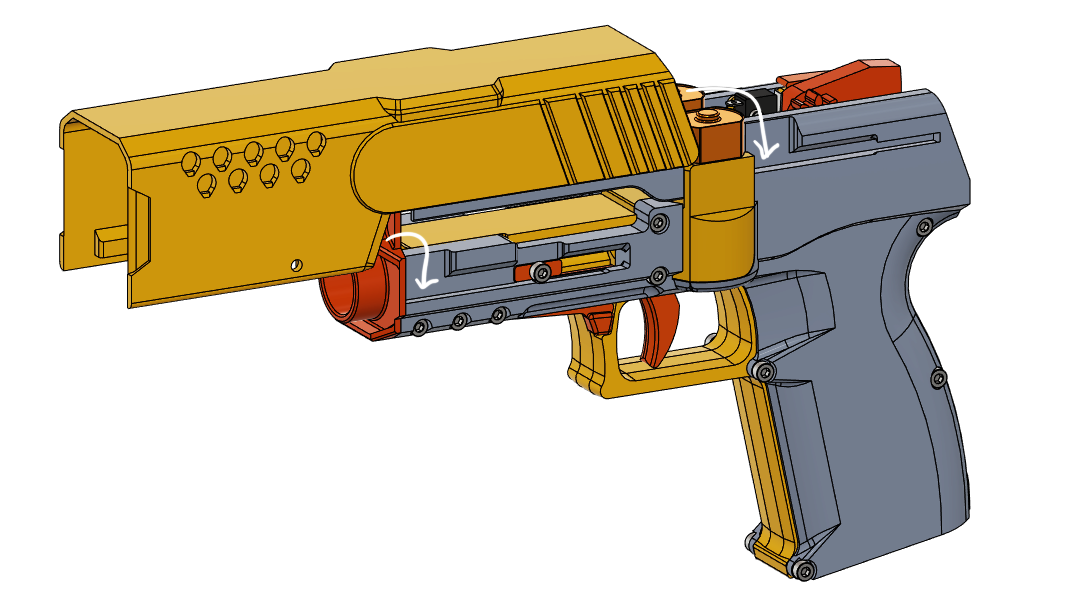
Magazine Handling
The Blaster is designed for use with Worker Talons and printed alternatives. Angled talons are not compatible.
For a flush mag-in-grip option, check out my custom Equalizer Magazines in the DevilZ’ Nerfworks shop.
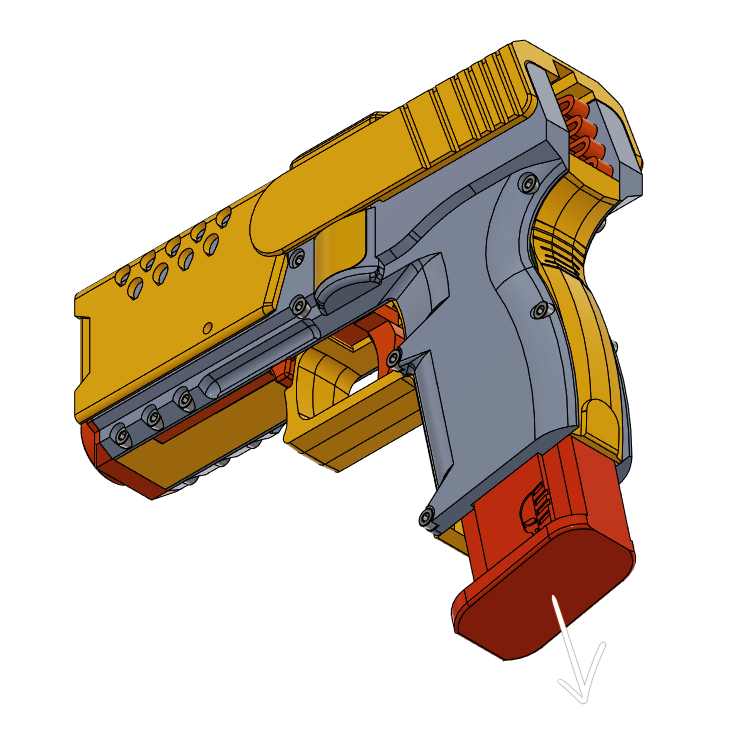
To remove the magazine, press on the raised surface on the heel of the grip and pull it out. The middle frame section flexing is normal and required for the function.
Concept Pistol Assembly
Constructing the Frame
Screw the left frame piece to both of the middle frame pieces using m3x10 screws. After installing, loosen the lower rear grip screw by a quarter turn to ensure smooth operation of the mag-release flexure.
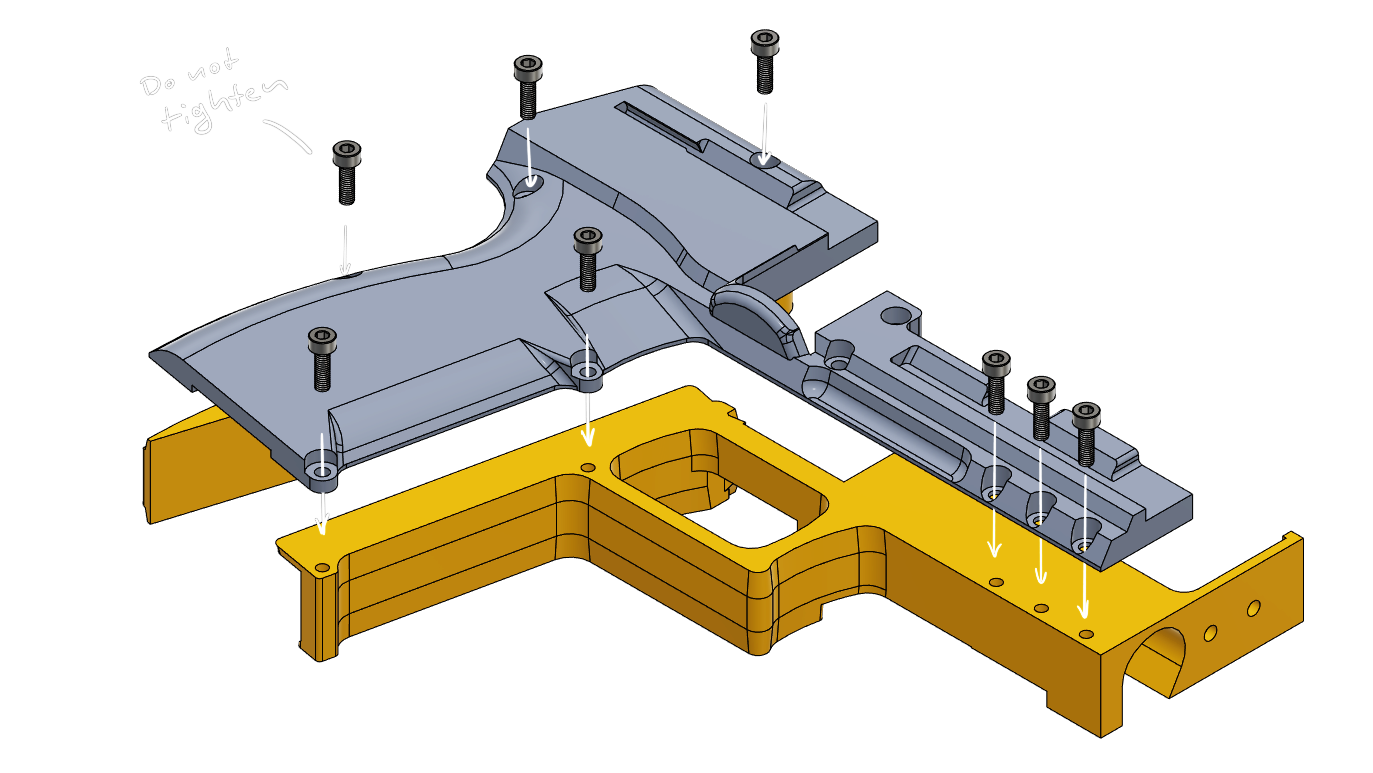
Place the Trigger, Pusher and Disassembly lever into the frame.
Install the right frame piece using m3x10 screws and mount the m3x4 screw into the trigger linkage. Loosen the lower rear grip screw on this side as well.
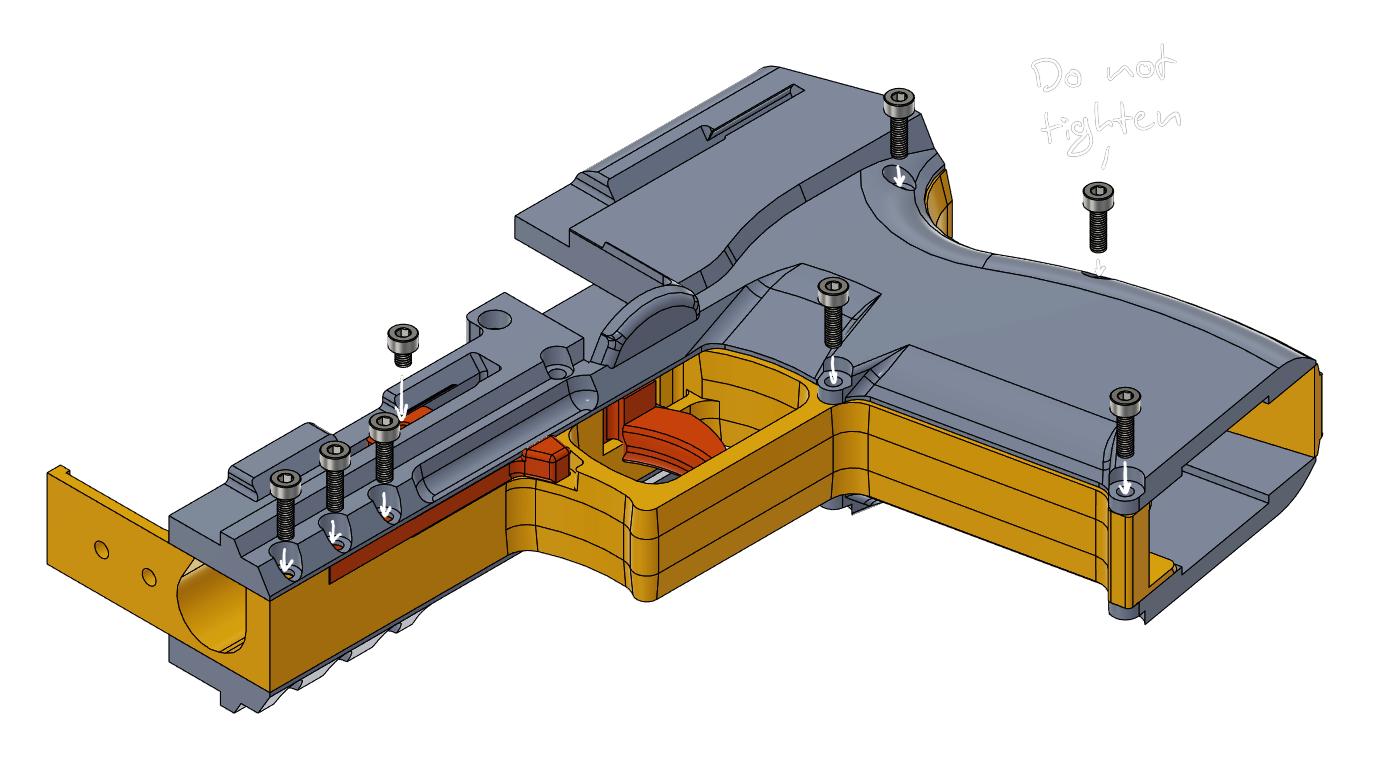
Install the front plate with another two m3x10 screws and place the printed slide return spring in its socket.
Setting up the Flywheels
Motors
Make sure your motors polarity is marked correctly by the red dot next to the terminals.
Mount your 130 size hobby motors to the flywheel cage using flat-head m2x4 screws.
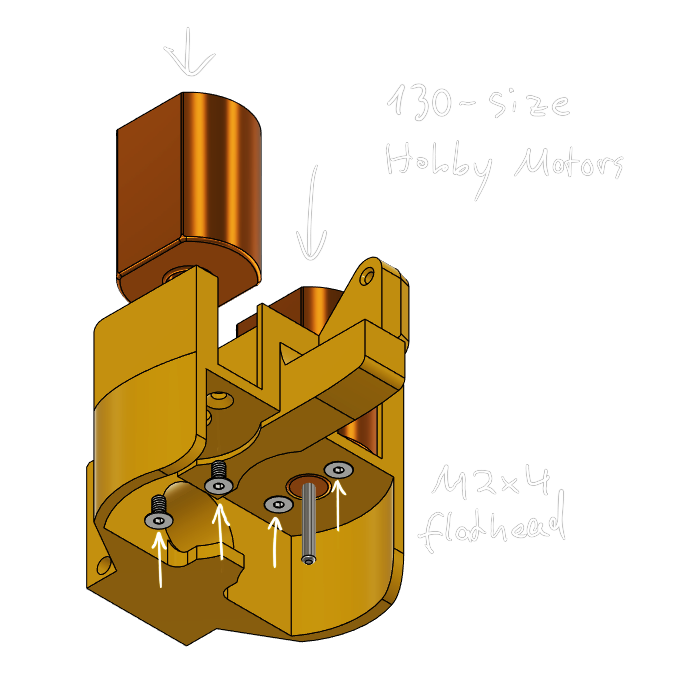
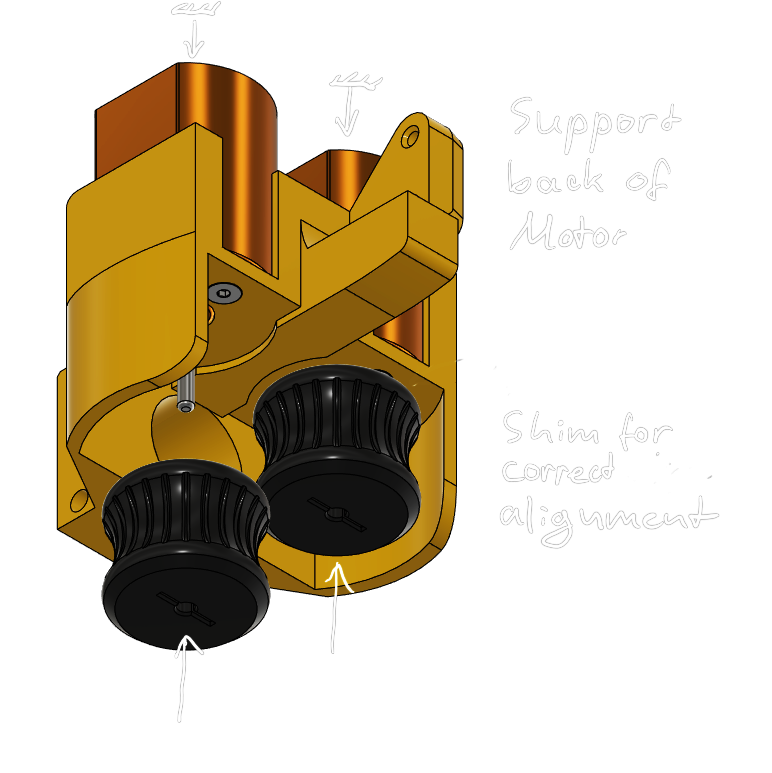
Flywheel Mounting
While pushing your Microwheel sized flywheels onto the motor shafts, support the motor-end-bell with a solid object to avoid damaging the bearings.
Ensure the flywheels are aligned to each other and centered with the barrel.
Switch Mounting
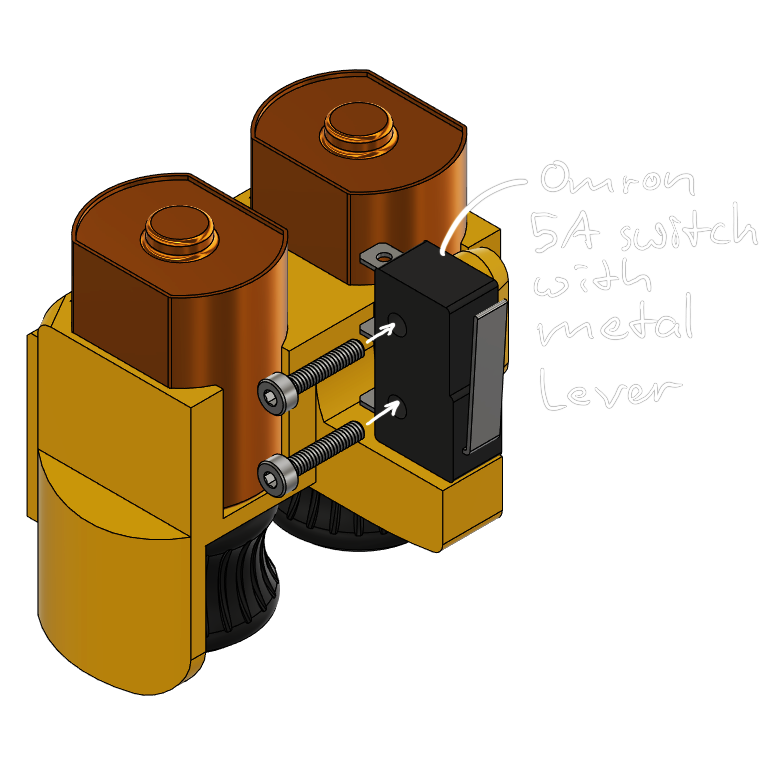
The tested and preferred switch for this build is a genuine 5A Omron switch with a short metal lever.
Mount your micro-switch to the cage with two m2x10 screws.
Soldering
The circuit is identical to any other semi auto flywheel blaster and will not be covered in this revision of the guide.
Mounting the Cage
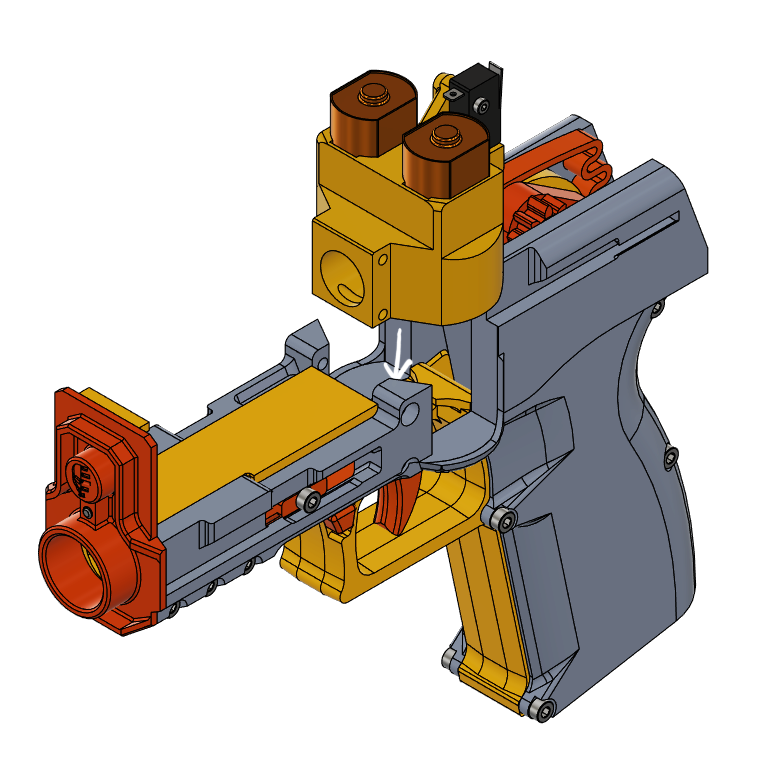
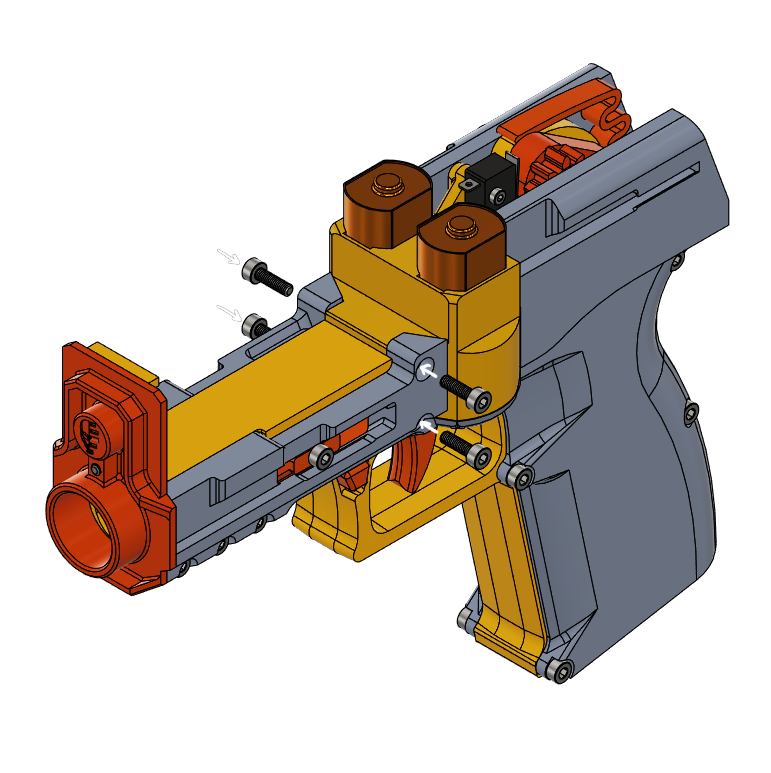
Screw the cage to the frame with the remaining four m3x10 screws.
Battery
Since the moving slide doubles as the battery compartment, it is critical that the battery is well seated and cables are not rubbing on the slide. With a smaller battery, an additional snap-in cover piece can be used to keep the wired and connectors secured. Make sure the micro-switch is not pressed by the pusher while connecting your Battery.
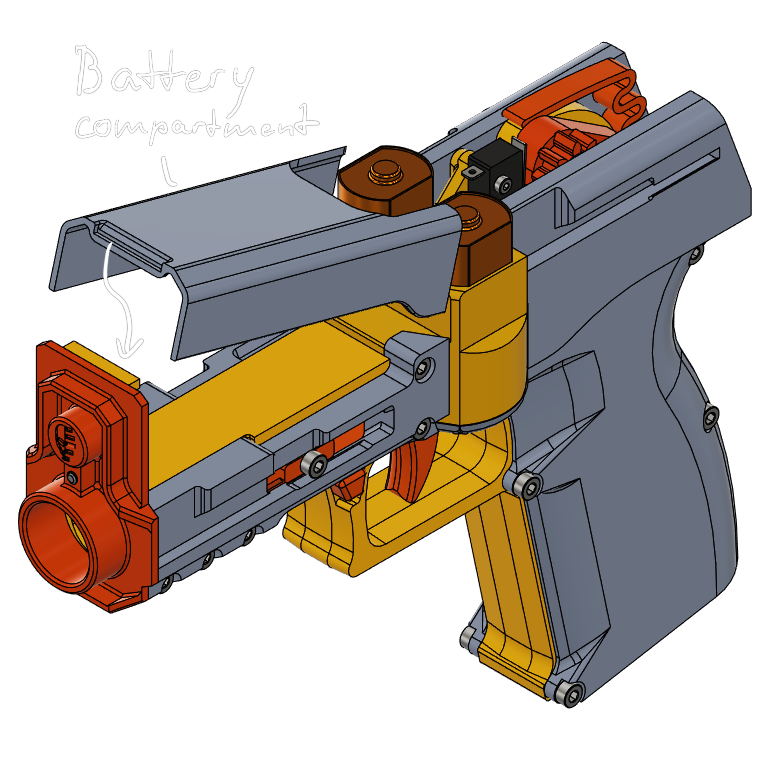
It is recommended to remove the battery when the blaster is stored, transported or between rounds.
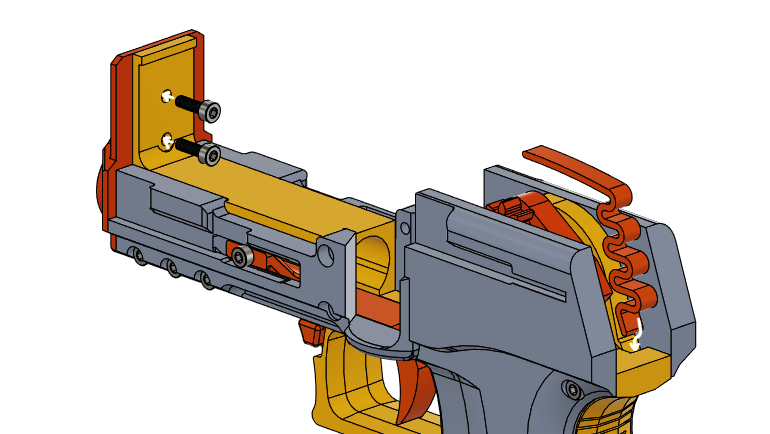
Mounting the Slide
Pull down the disassembly lever to move the trigger forward; Ensure the pusher is raised slightly above the frame. That way, the pusher will auto-align with the gear rack on the slide.
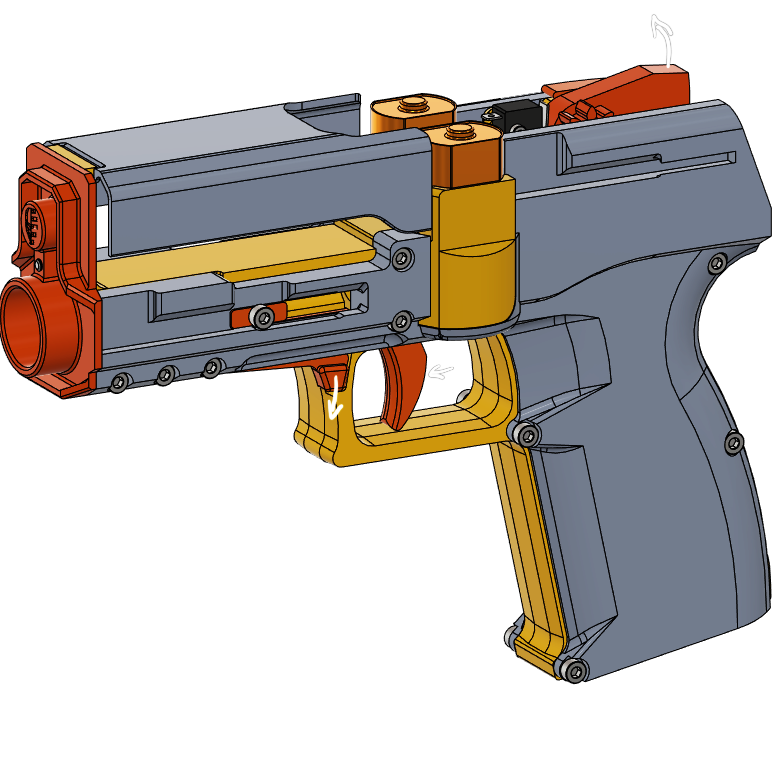
If you are using the battery cover, the slide has to be eased into its position from the front, otherwise it can just be dropped into its channels from above. After doing so, pull the trigger back until the disassembly lever re-engages.

Love the design! I just have a couple trouble shooting questions:
– my slide is catching on the top of the main middle part of the blaster near the front plate. It also looks like it is contacting the upper corners of the front plate. The slide itself is a tad warped outward, but still slides smoothly through the channels.
– the equalizer mag I have printed currently is a super tight fit. I can force it all the way in, but after that it does not want to come out. Is there something I should be sanding that in missing?
Thank you guys for this awesome design! I feel it is a great way to put one of my new printers through its paces!
Impressive work, just a question about mags, are worker angled talon mags compatible or do you think it could take much to modify the original deisgn to support them?
Right now it is only compatible with straight mags. With the step file pack you could adjust the position of the mag release and the magwell geometry to fit angled talons, but I can’t guarantee the pusher will work with them.
Thanks for your guidance.
I will reprint at 101% and see from there, as indeed it feels the rubbing is responsible for this issue, even though I spent hours grinding the part… I trust this is the most appropriate suggestion. Thanks again ever so much for such constructive tips. Much Appreciated.
Kind Regards
Hi Guys, printed the Concept Pistol, and after 3 days of adjusting I still cannot get the spring to bring back the slider, way to much frictions, am I missing something here? The Pusher is nice and loose on its axis rotation, and one the slider is on the Pistol, after grinding + silicone etc, still can get it to come back to initial position after trigger…. Is this mechanism helped by the motors (which I have not yet installed), or else, I need some help please. Thanks for your consideration, I really want to make this work!!! Cheers
Hi Frederic,
The fileset comes with three different strengths of printed springs, but i suspect there’s a little more at play here.
If you can track down on what spot exactly the slide is grinding, I can tell you what exactly to adjust. That said, here’s some general pointers:
If your slide print is a bit warped and the sides are bowing towards the inside, you can try reprinting it in a different orientation, with the slanted rear surface flat on the Printbed.
You can also try scaling the slide in its width to 101% in the slicer to give yourself just a bit more Tolerance.
Lastly you can add up to two springs with a diameter of 4mm or less to the slide channels in the rear of the frame, like this one https://www.mcmaster.com/1986K48/
That’s really more of a brute force option, but it will work.